How to use Filezilla
22 July 2014
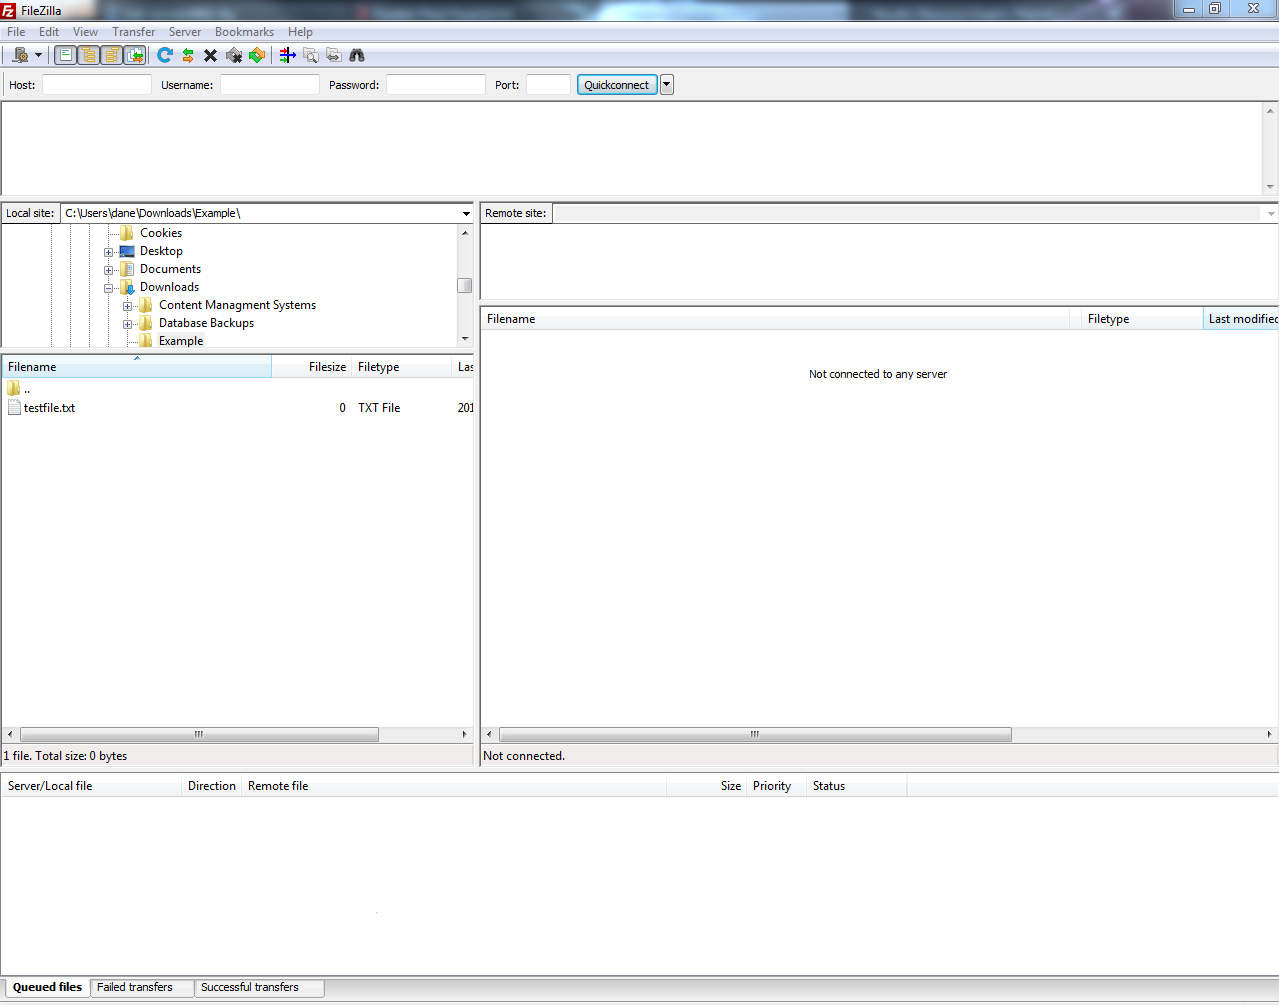
Once you have downloaded Filezilla and installed it, you will then need double click on the Filezilla icon and you should see the following screen below.
- Step 1
In order to connect to our server, you will need to use the FTP details that we have provided you with. These details will need to be entered in the following fields.
Hostname -> This can either be the servers ip address or the domain name eg www.yourdomain.com
Username -> This will be the FTP Username that we have provided you with eg yourdomain-ftp
Password -> This will be the FTP password that we have provided you with eg yourpassword
Port     -> FTP operates on port 21 which is already set by filezilla so leave it blank.
- Step 2
Once you have entered all the details, click on the Quick Connect button, you will then see the following directory listing appear on the right window pain.
- Step 3
The httpdocs directory is known as the Root Directory. This is the folder that you will upload your website to. All you need to do is double click on httpdocs and you should see the following default Plesk generated page with a few files and folders. Simply remove these files by holding CTRL and A and then press the DELETE key. This will remove all files and folders in this directory.
- Step 4
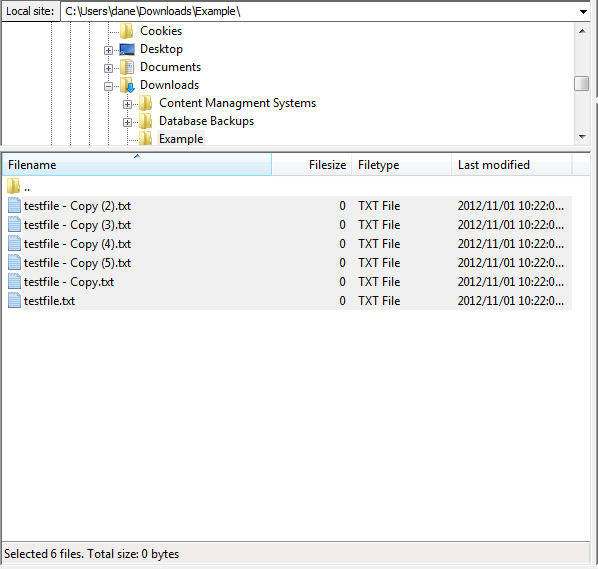
Now you are ready to upload your files. I you have a look on the left window pane,you will see the option of Local Site. Here you can locate the directory on your computer where the website files are stored. Press CTRL and A and all of the files in the directory will be selected.
- Step 5
Once you have selected the file on your local machine, you can either right-click and select upload or simply drag the contents over to the httpdocs directory. You should then see the files that you selected on the left window pane appear on the right window pane as well. Remember that this depends on how large the files are that you are uploading so it can take some time.
- Step 6
Once the files have upload successfully, you should see the following at the bottom of your screen.
Recent Articles
IMAGINET NOW OFFERING CELL C FIXED WIRELESS
How to get RICA ReadyHow to get ready to RICA
Six Reasons you should not live without Fibre
Limit my TrafficWhy does my ISP Limit or Shape my
What limits you on our email servers at
What is an SSL Certificate and why do I need Trace-routes
Trace Routes and what you need to know
Images-and-wordpressHow to make your wordpress site faster with image optimisation.
Modem Troubleshooting
Window 10 IssuesWindows 10 and what you should know about it.
Why would anyone register an international domain name if they


